
Introduction
Overview of LeadWpp - Lead Generation Addon for for OvoWpp
Meet LeadWpp – the smart and powerful Google Maps Lead Generation Addon built exclusively for OvoWpp. Discover and collect high-quality business leads directly from Google Maps with a fast, seamless, and user-friendly experience.
LeadWpp enables your users to search businesses by category and location, then instantly collect valuable business information, including business names, phone numbers, email addresses (when available), websites, ratings, addresses, and more—all from within the OvoWpp dashboard. Build targeted lead lists in minutes and streamline your customer acquisition process with minimal effort.
Whether you're running a digital marketing agency, lead generation business, sales team, or SaaS platform, LeadWpp provides the tools you need to find qualified prospects, grow your customer base, and scale your business more efficiently using accurate business data from Google Maps.
This documentation provides a comprehensive overview of the entire system, outlining the core processes in a clear and structured manner for easy understanding. It is designed to guide you through the complete addon installation process directly from the admin panel, allowing you to configure and deploy addons effortlessly with no coding knowledge required. Detailed step-by-step instructions and visual references ensure a smooth and hassle-free installation experience.
Thank you for choosing LeadWpp If you have any questions not covered in this documentation, please feel free to reach out to us via email. We’re here to assist and will respond as promptly as possible. Thank you again!
Prerequisites
All the prerequisites before starting with OvoWpp.
LeadWpp is an addon module for OvoWpp and is not a standalone product. A valid and active installation of OvoWpp is required before installing or using LeadWpp. This addon is designed to integrate seamlessly with the OvoWpp platform and relies on its core system functionality to operate.
- OvoWpp Latest Version: Before using LeadWpp, ensure that your system is running the latest version of OvoWpp. Updating to the latest version is required to guarantee full compatibility, security improvements, and access to all newest features and enhancements.
- Google Maps API Key: LeadWpp requires a valid Google Maps API key with billing enabled and the Places API activated. Make sure your API key is properly configured and has the necessary permissions before proceeding with the setup.
Server Requirements
All server requirements are stated bellow
LeadWpp runs inside OvoWpp, so it inherits the OvoWpp server requirements. The few items below are the ones the Addon Manager needs specifically in order to accept and install an addon package.
Base Application
- OvoWpp v2.4 or newer, already installed and working. LeadWpp is an addon, not a standalone product.
- Administrator access to the OvoWpp admin panel.
- Your LeadWpp purchase code and account username. This is the addon’s own purchase code — not the one used to install OvoWpp.
Addon Manager Requirements
- Zip PHP Extension — to read and unpack the addon package.
- Fileinfo PHP Extension — to validate the uploaded file.
- cURL and OpenSSL PHP Extensions, plus outbound HTTPS access — to verify your purchase code.
- JSON PHP Extension.
-
core/addonswritable (755) — where the addon is unpacked. -
core/storage/app/temp/addonwritable (755) — the upload staging folder. It is created automatically if it does not exist.
You do not have to verify these by hand. The Addon Manager checks every item above before it accepts an upload and names the exact item that is missing if something is not in place.
Platform Requirements (inherited from OvoWpp)
- PHP Version 8.3 or 8.3+
- MySQL Version 8.0+ or MariaDB version 10.6+
- BCMath PHP Extension
- Ctype PHP Extension
- cURL PHP Extension
- DOM PHP Extension
- Fileinfo PHP Extension
- GD PHP Extension
- JSON PHP Extension
- Mbstring PHP Extension
- OpenSSL PHP Extension
- PCRE PHP Extension
- PDO PHP Extension
- pdo_mysql PHP Extension
- Tokenizer PHP Extension
- XML PHP Extension
- Filter PHP Extension
- Hash PHP Extension
- Session PHP Extension
- Zip PHP Extension
- allow_url_fopen()
- file_get_contents()
Installation
Application installation process
LeadWpp is installed entirely from the OvoWpp admin panel. You
upload one file, addon.zip, and the Addon Manager
verifies your licence, unpacks the addon and creates its database
tables for you. Nothing has to be uploaded by FTP and no SQL
file has to be imported.
Before you begin
- OvoWpp v2.4 or newer is installed and you can sign in as an administrator.
- You have your LeadWpp purchase code and account username from CodeCanyon (Download → License certificate & purchase code).
- Your server meets the Addon Manager requirements.
Installation Steps
-
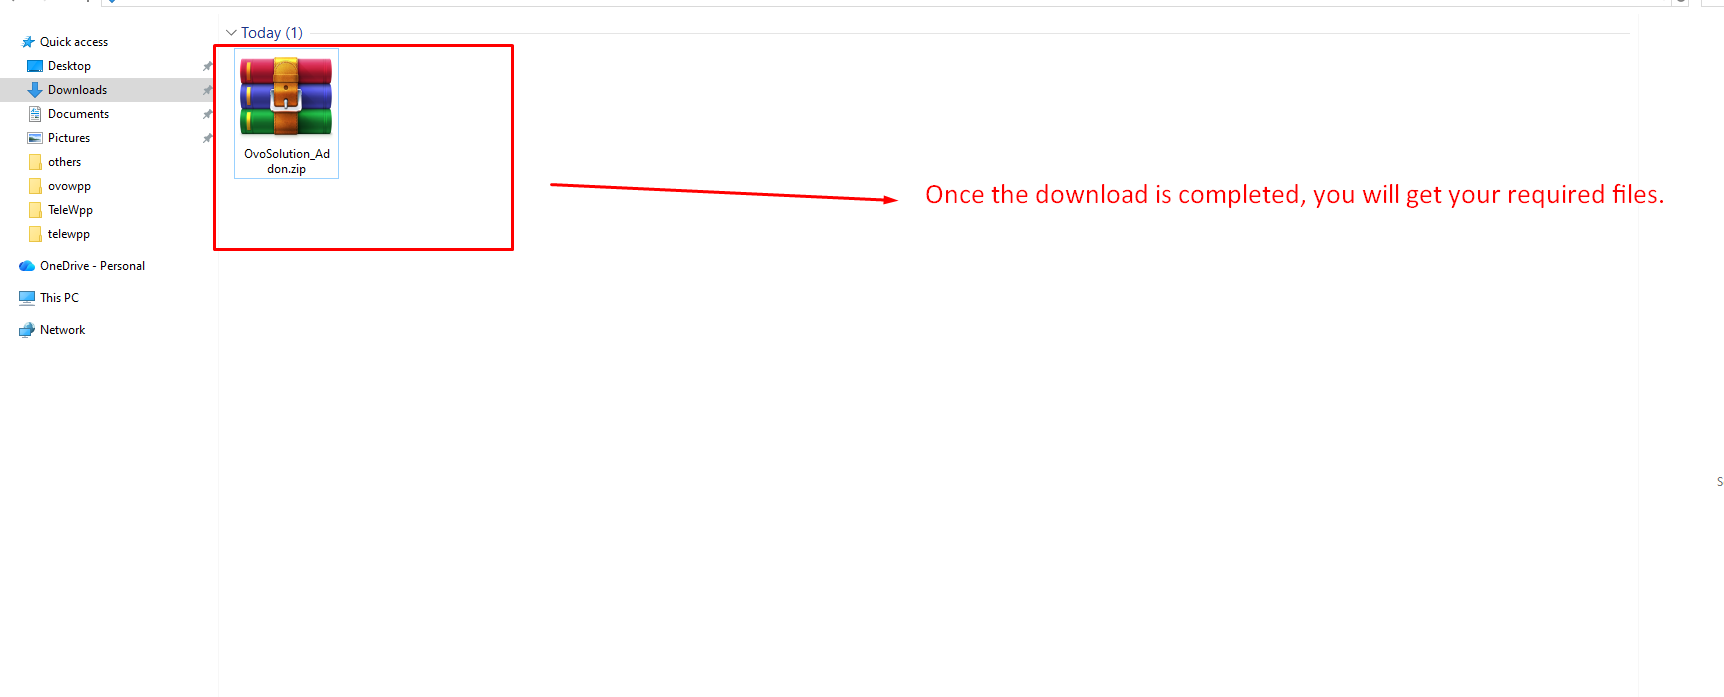
Step 1 — CodeCanyon Download:
After purchasing LeadWpp, you can download your
product files from your CodeCanyon account. Simply log
in to your account and navigate to the Downloads
section.
From there, locate your purchased item and click the
Download button.
Select Installable File Only or the full package
depending on your requirement.
For direct access, visit your downloads page:
CodeCanyon Downloads
-
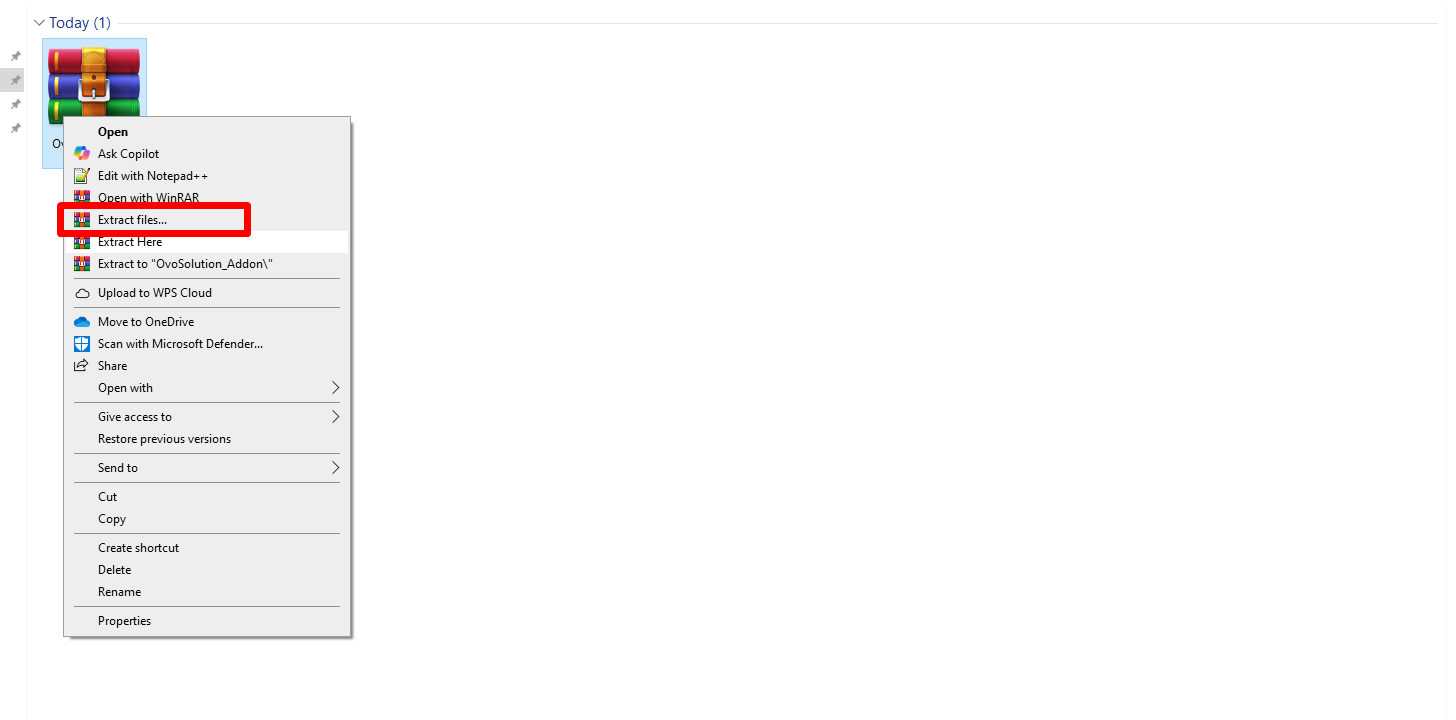
Step 2: Kindly extract the downloaded ZIP file.
-
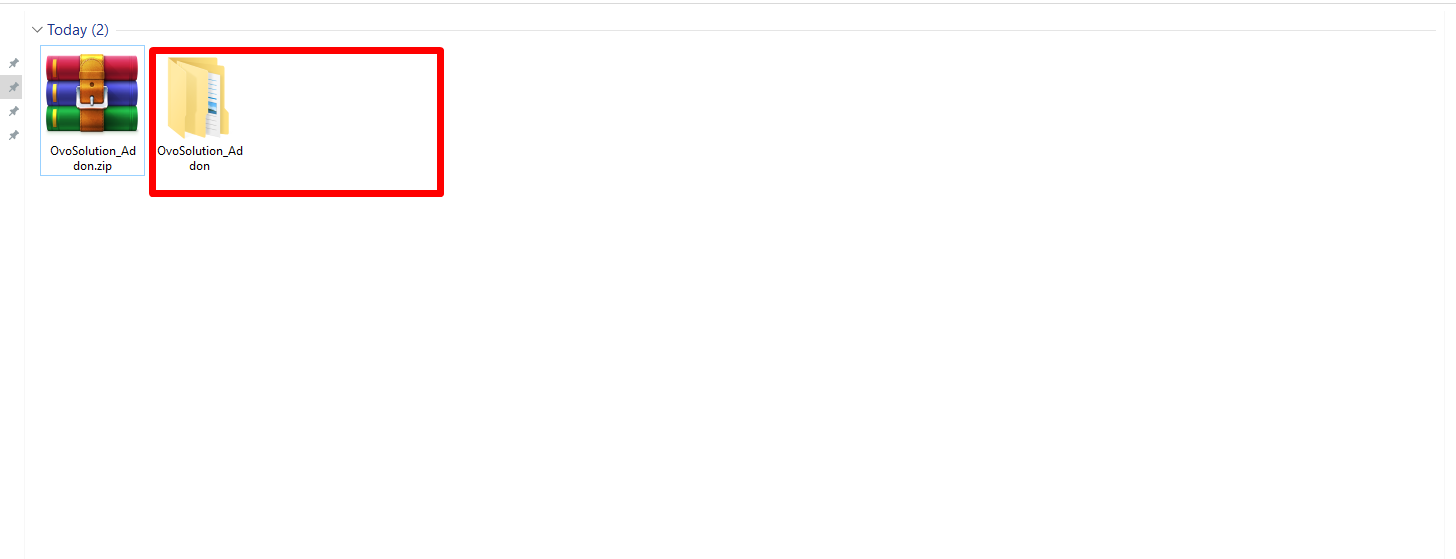
Step 3: Kindly open the extracted folder.
-
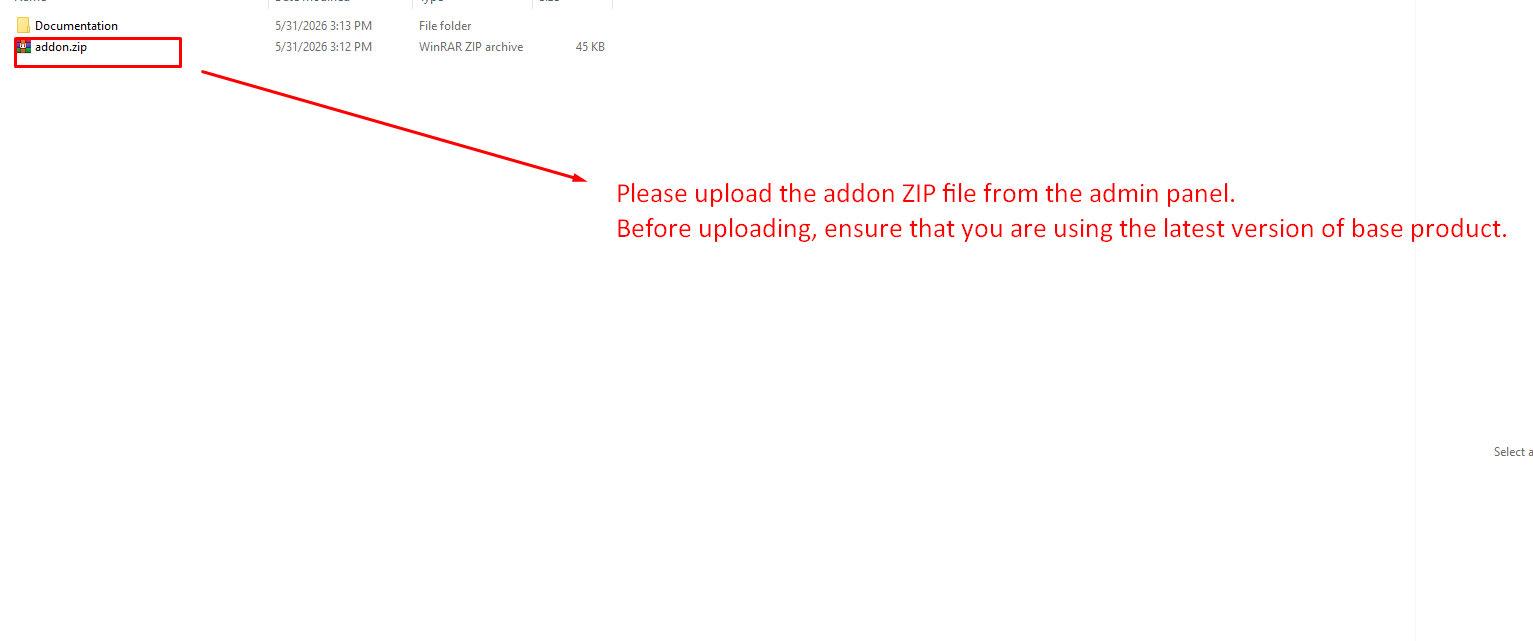
Step 4: Inside the extracted folder, you can locate the
addon.zipfile. This is the file you upload — do not extract it.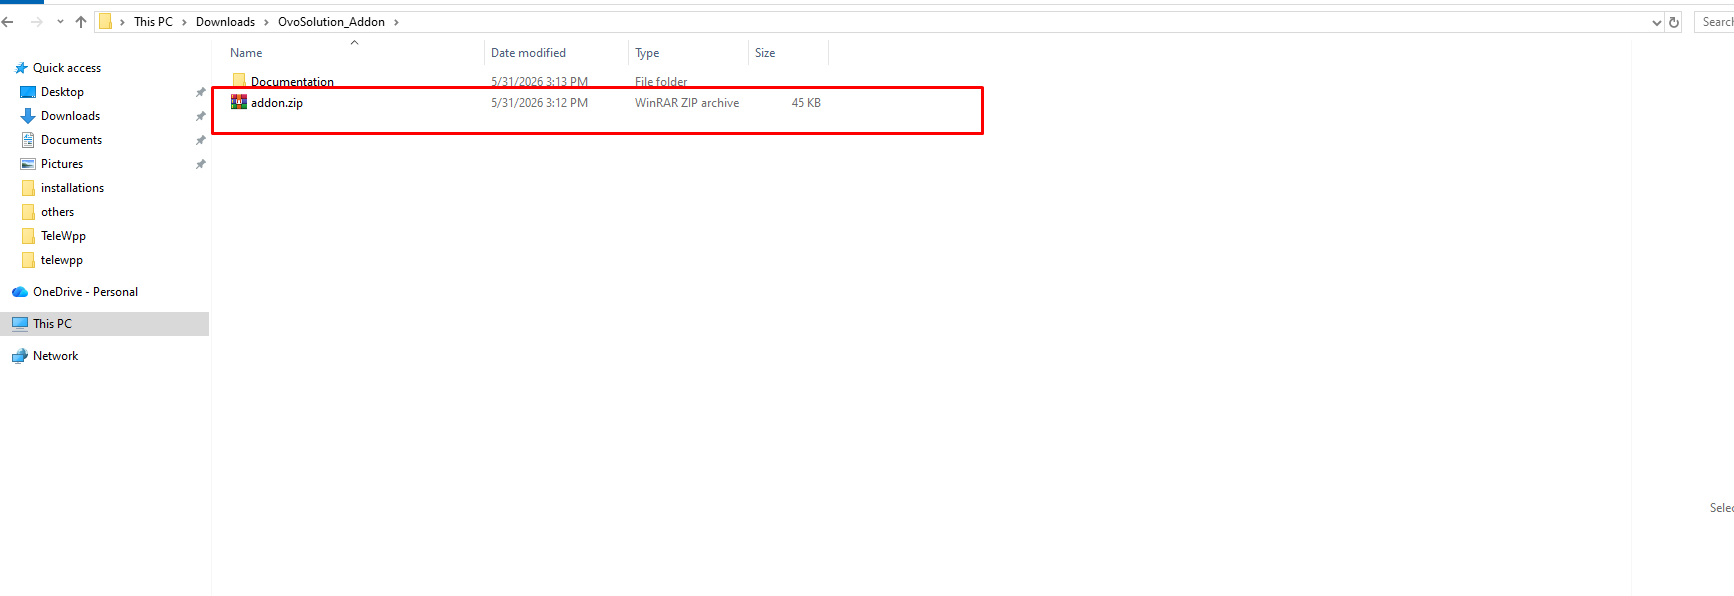
-
Step 5: Go to your base product (OvoWpp) admin panel
and open the Addon Manager menu, for example
https://your-domain.com/admin/addons.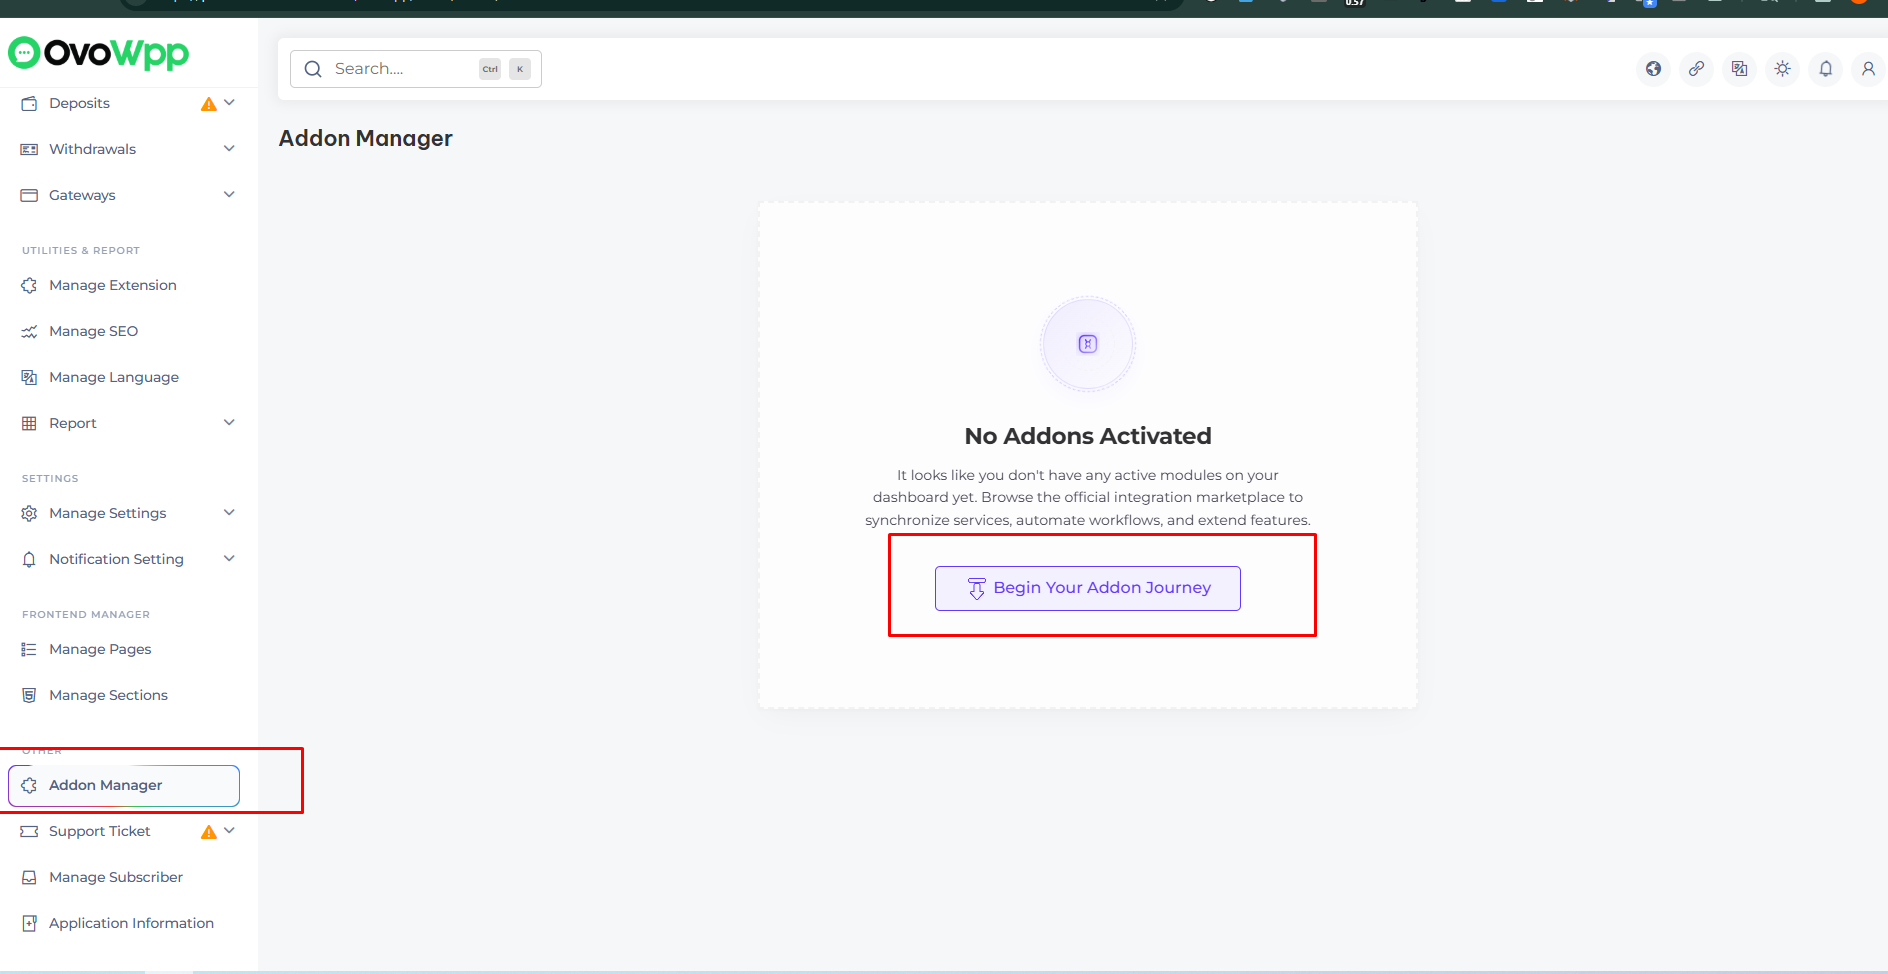
-
Step 6: Click Install New Addon, then
upload the
addon.zipfile together with your purchase code and account username, and submit.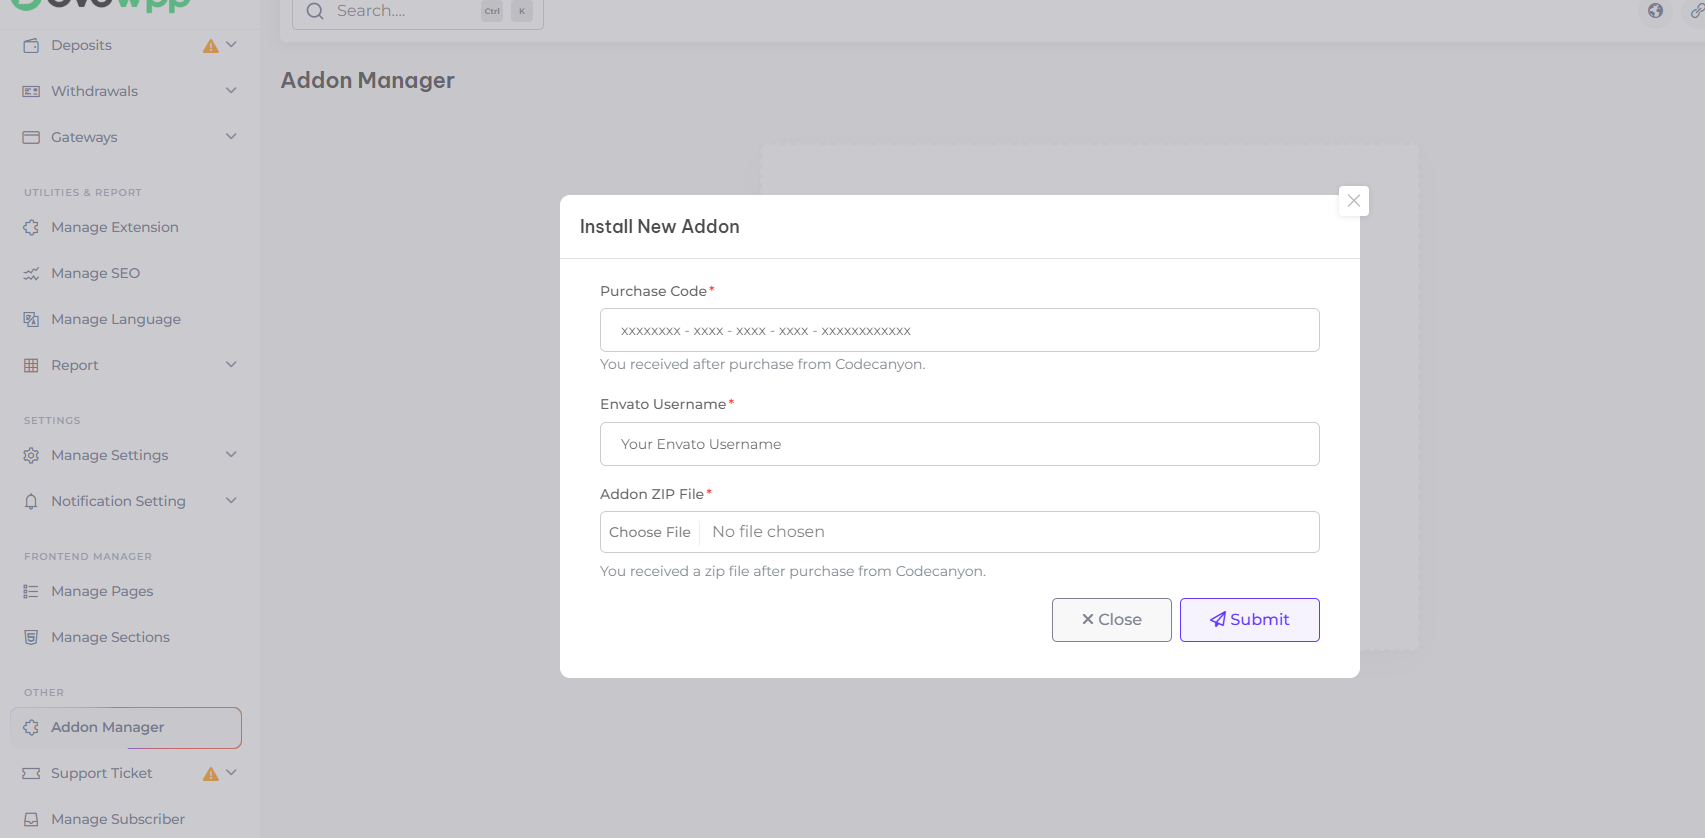
-
Step 7: The addon is verified, unpacked into
core/addonsand its database tables are created automatically. When the upload finishes, LeadWpp is installed and its menus appear in the panel.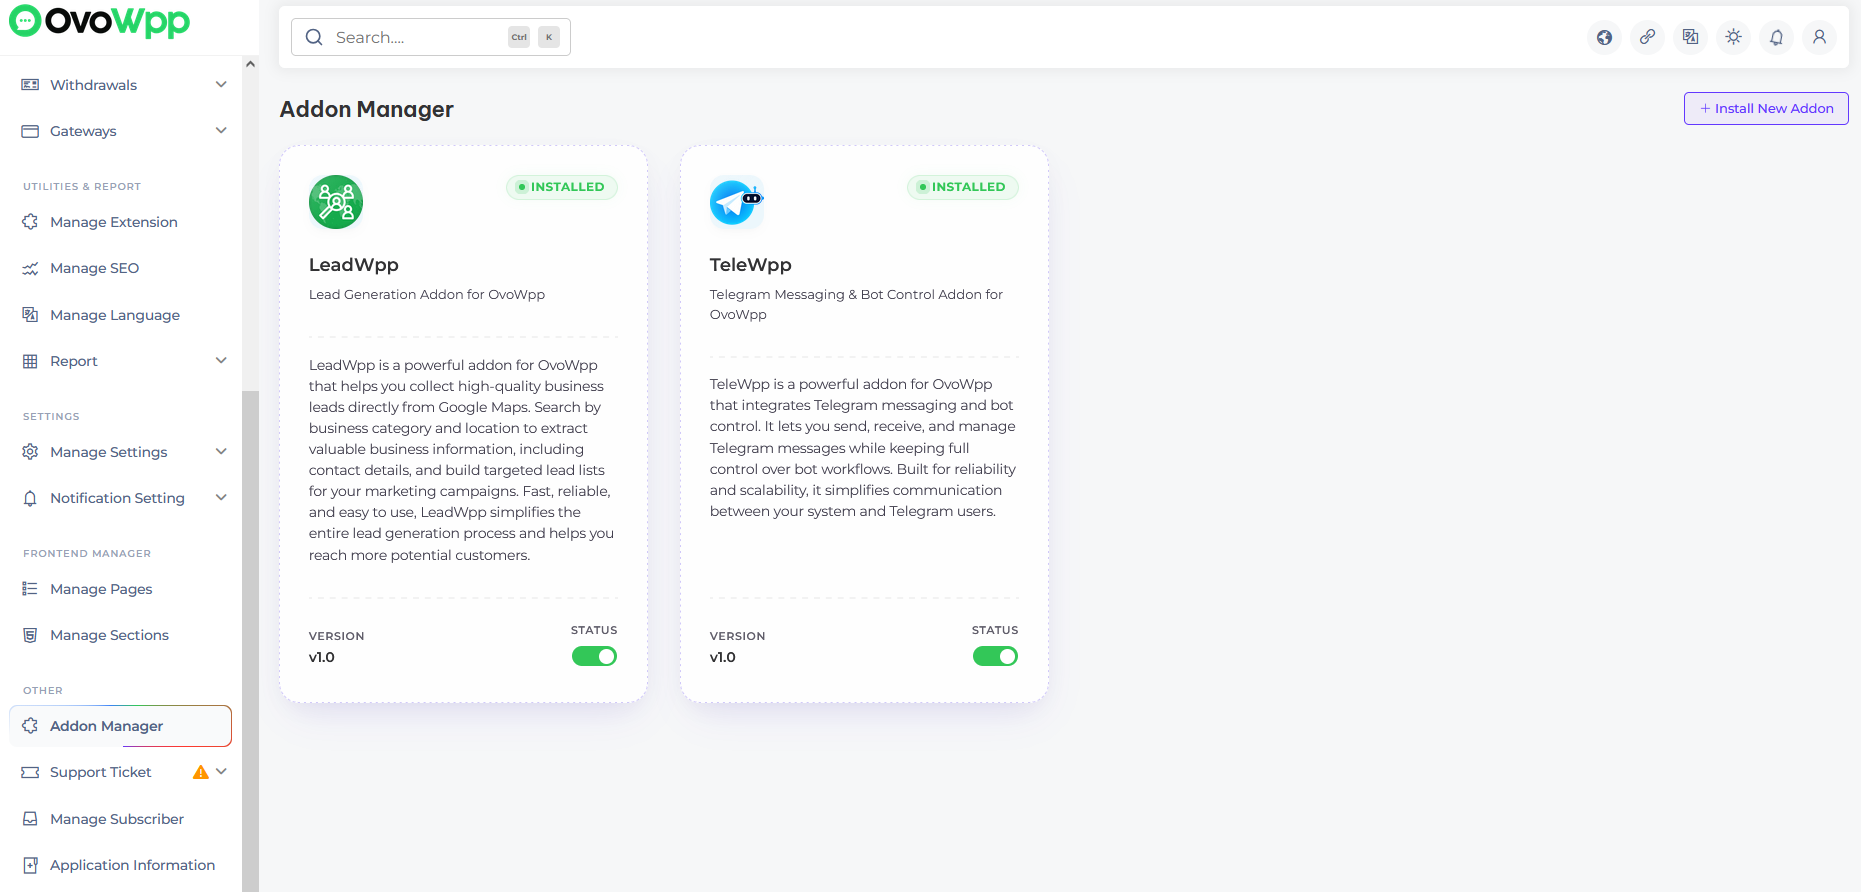
The database is handled for you. LeadWpp ships its schema as versioned Laravel migrations, which the Addon Manager runs during the upload. If anything fails part way through, those changes are rolled back automatically and the addon is not registered — so a failed attempt leaves nothing behind and you can simply try again.
Each addon can only be installed once per purchase code. If you see “This addon is already uploaded to your server”, LeadWpp is already installed — look for it in the Addon Manager list rather than uploading it again. To move to a newer release, use the Update Addon flow instead.
If you still face any installation issues, please reach out to us. We offer free installation support for cPanel-based hosting and also assist with other hosting platforms.
Folder Structure
Important details about the application folder structure
The addon.zip package contains one folder and one file.
You never need to open it — the Addon Manager unpacks it into
core/addons/LeadWpp on your server — but this is
what is inside.
- Source
- config.json
-
The
Sourcefolder contains the core addon Laravel files, maintaining the full MVC structure of the project for seamless functionality and organization. -
Source/database/migrationsholds the addon’s versioned database migrations. These are executed by the Addon Manager when you install or update the addon, and they are what replaced the raw SQL file used by older releases. -
The
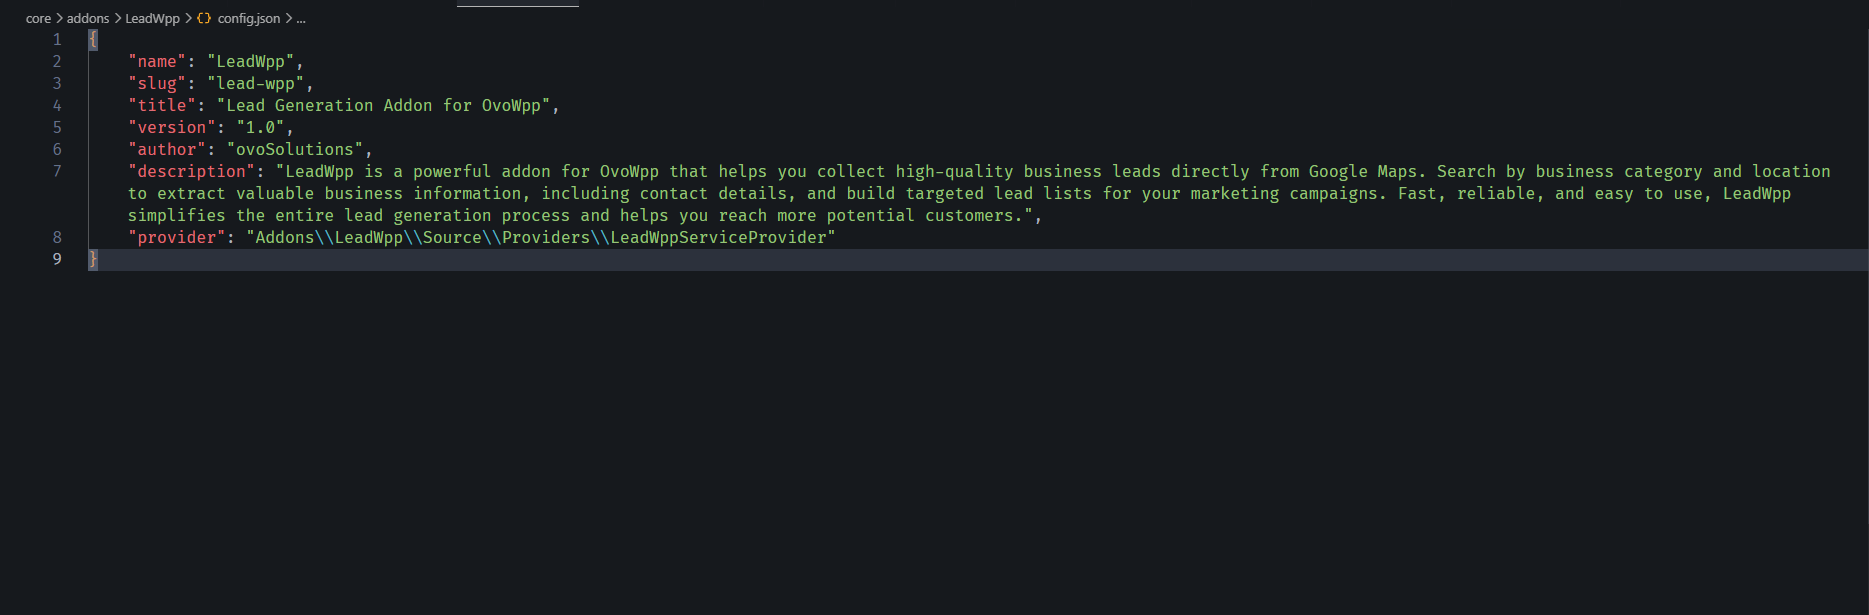
config.jsonfile includes all necessary configuration settings and addon metadata — name, slug, version and service provider. It is mandatory for the addon to work correctly, and the version it declares is what the update check compares against.
Install/Uninstall
After installation, the addon can be installed or uninstalled anytime from the admin panel.
Update Addon
Moving LeadWpp to a newer release from the admin panel
LeadWpp updates itself from the Addon Manager. When a newer release is available, an Update available badge showing the new version number appears beside the addon. You never need to uninstall the addon or touch its files or database directly.
The update check runs through OvoWpp’s cron job. If the badge never appears, confirm the cron job is configured and running from Admin Panel → Cron Job Setting.
Steps
- Step 1: Back up your site and database first, as you would for any update.
-
Step 2: Download the latest LeadWpp package from your
CodeCanyon downloads page, extract it, and locate the new
addon.zip. Make sure its version matches the version shown on the badge. - Step 3: In Admin Panel → Addon Manager, click Update now on the LeadWpp update badge.
-
Step 4: Drop the new
addon.zipinto the upload area and submit. Your licence is re-verified, the new files are merged over the installed addon, any new database changes are applied and the caches are cleared automatically. - Step 5: The version number beside LeadWpp updates and the badge disappears. Nothing further is required.
The uploaded package must be for LeadWpp and must be the exact version being offered. Uploading a different addon, or an older build, is refused and nothing on your site is changed.
Your LeadWpp data is never removed by an update. Existing records are kept and only new tables or columns are added.
Manage City
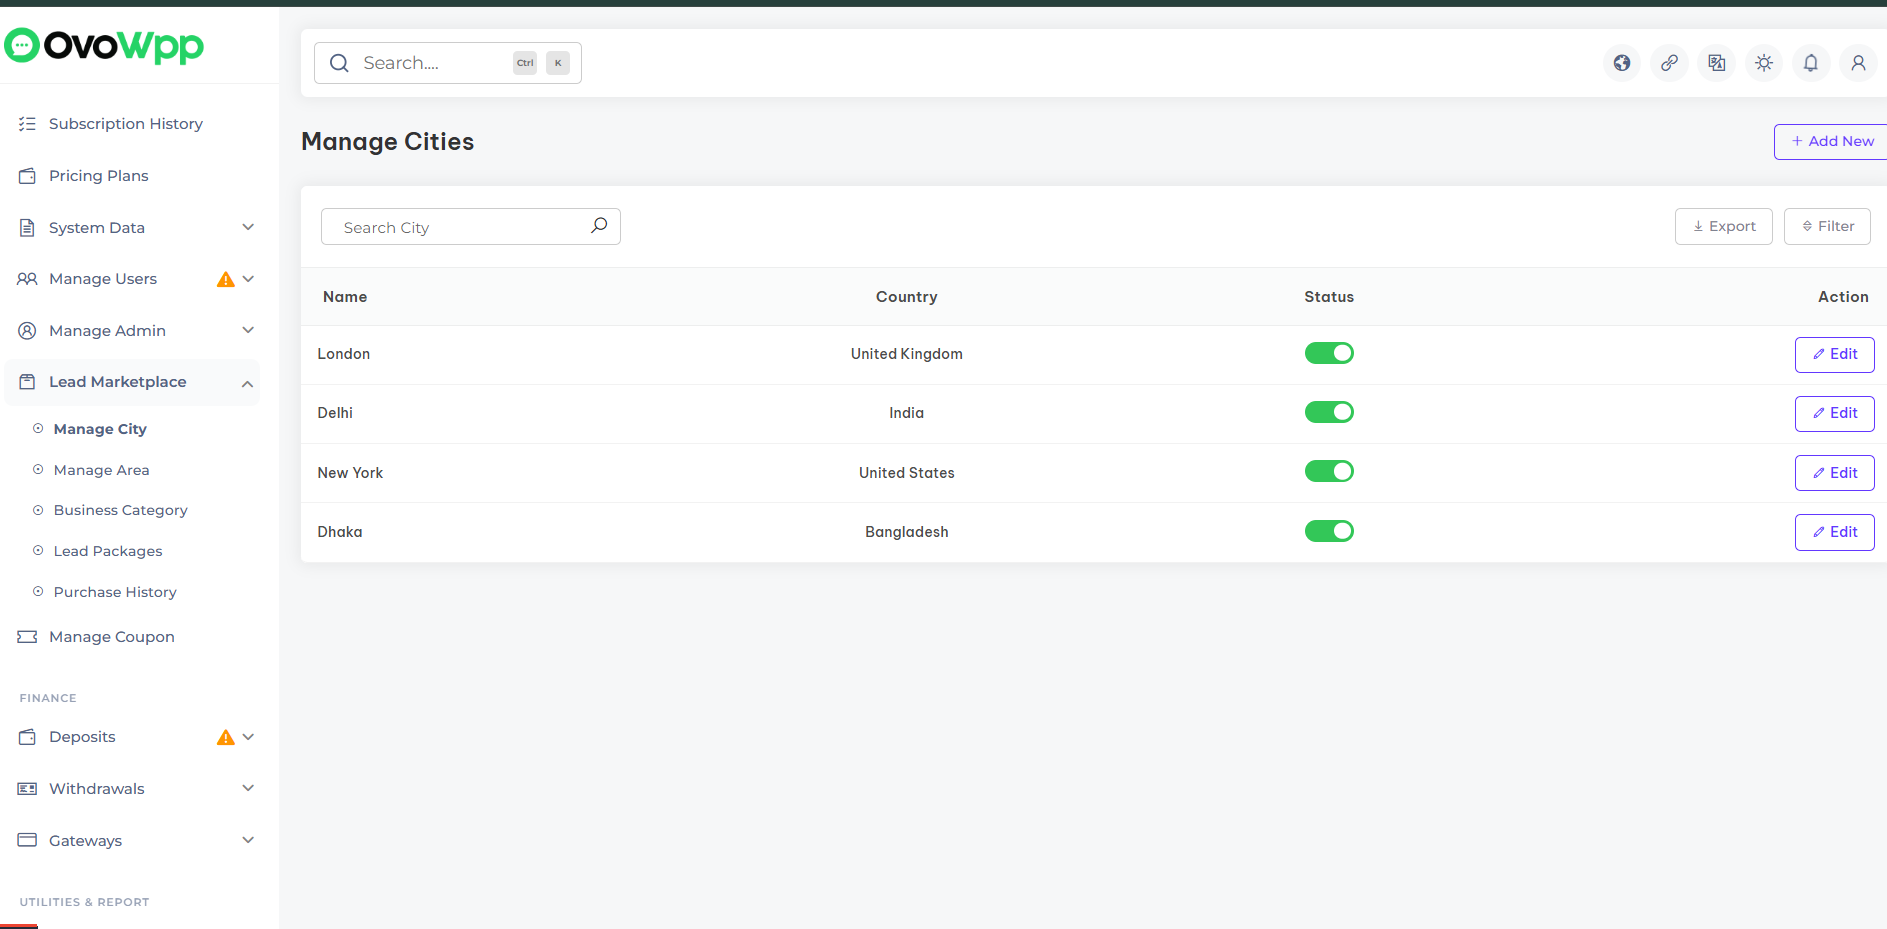
Once the LeadWpp Addon is installed, you can easily manage the list of cities available for lead generation. Add, edit cities to control where admin can search and collect business leads from Google Maps.
Manage Area
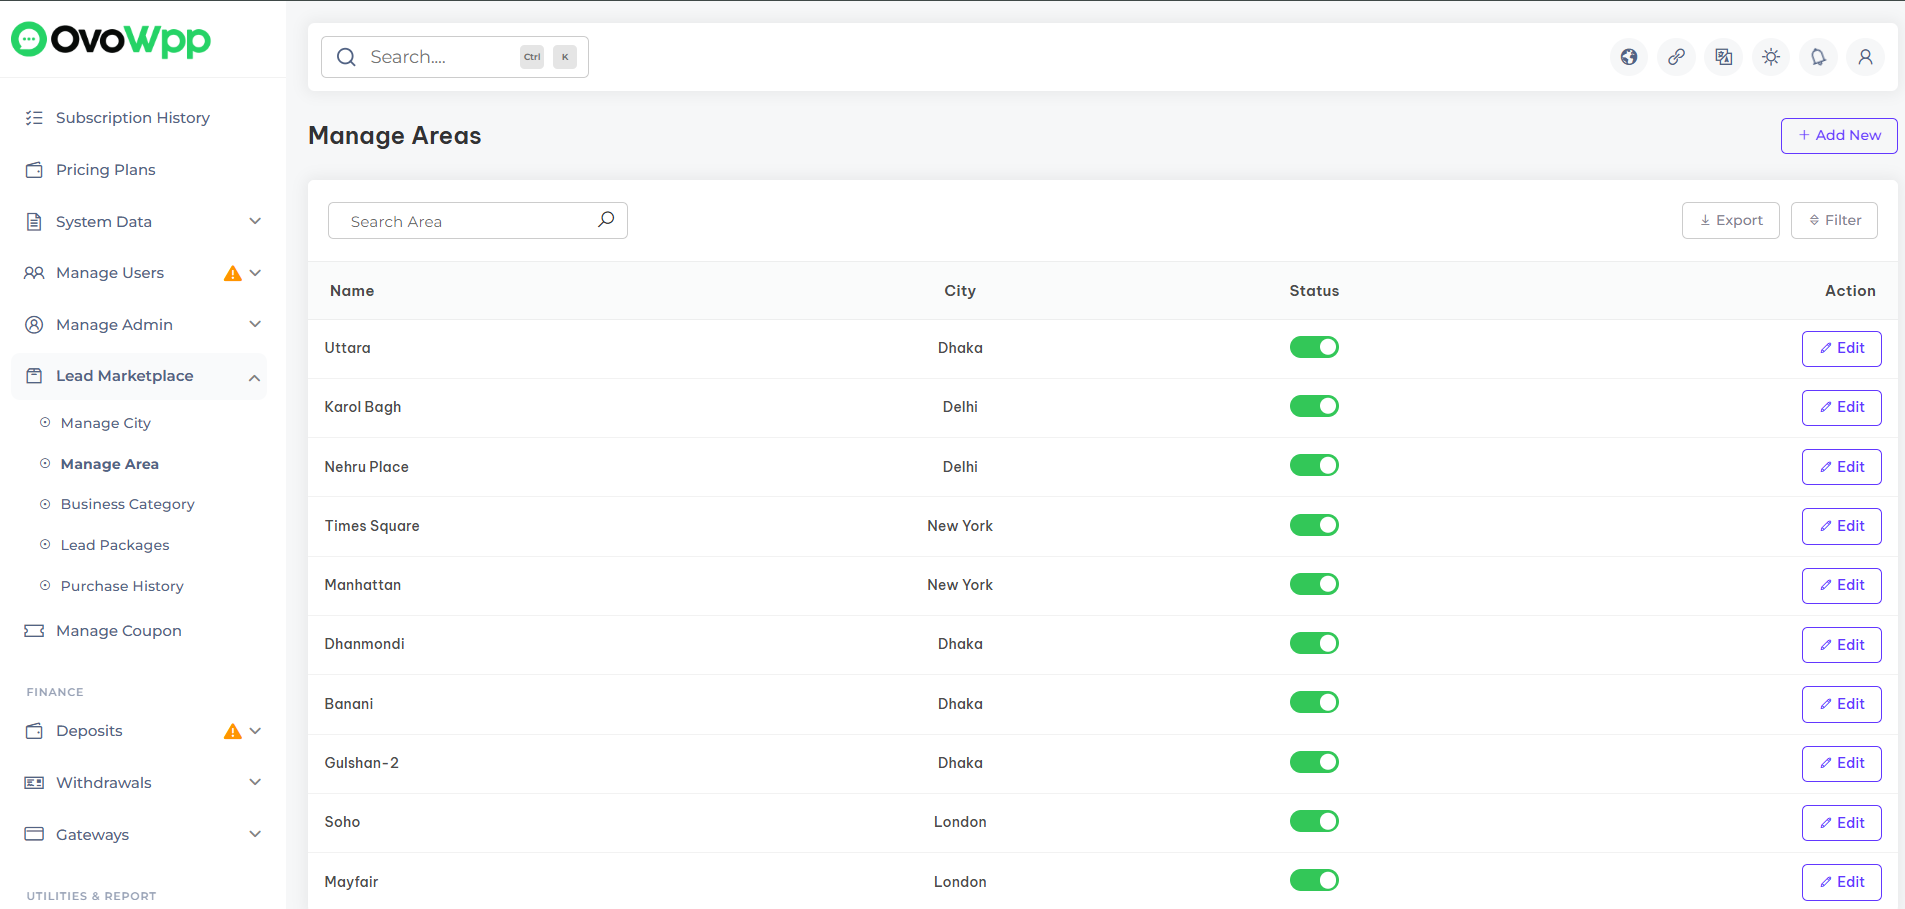
Once the LeadWpp Addon is installed, you can easily manage the list of areas for each city. Add, edit, or active/inactive business areas to help admin perform more targeted Google Maps searches and generate accurate, location-specific leads.
Business Category
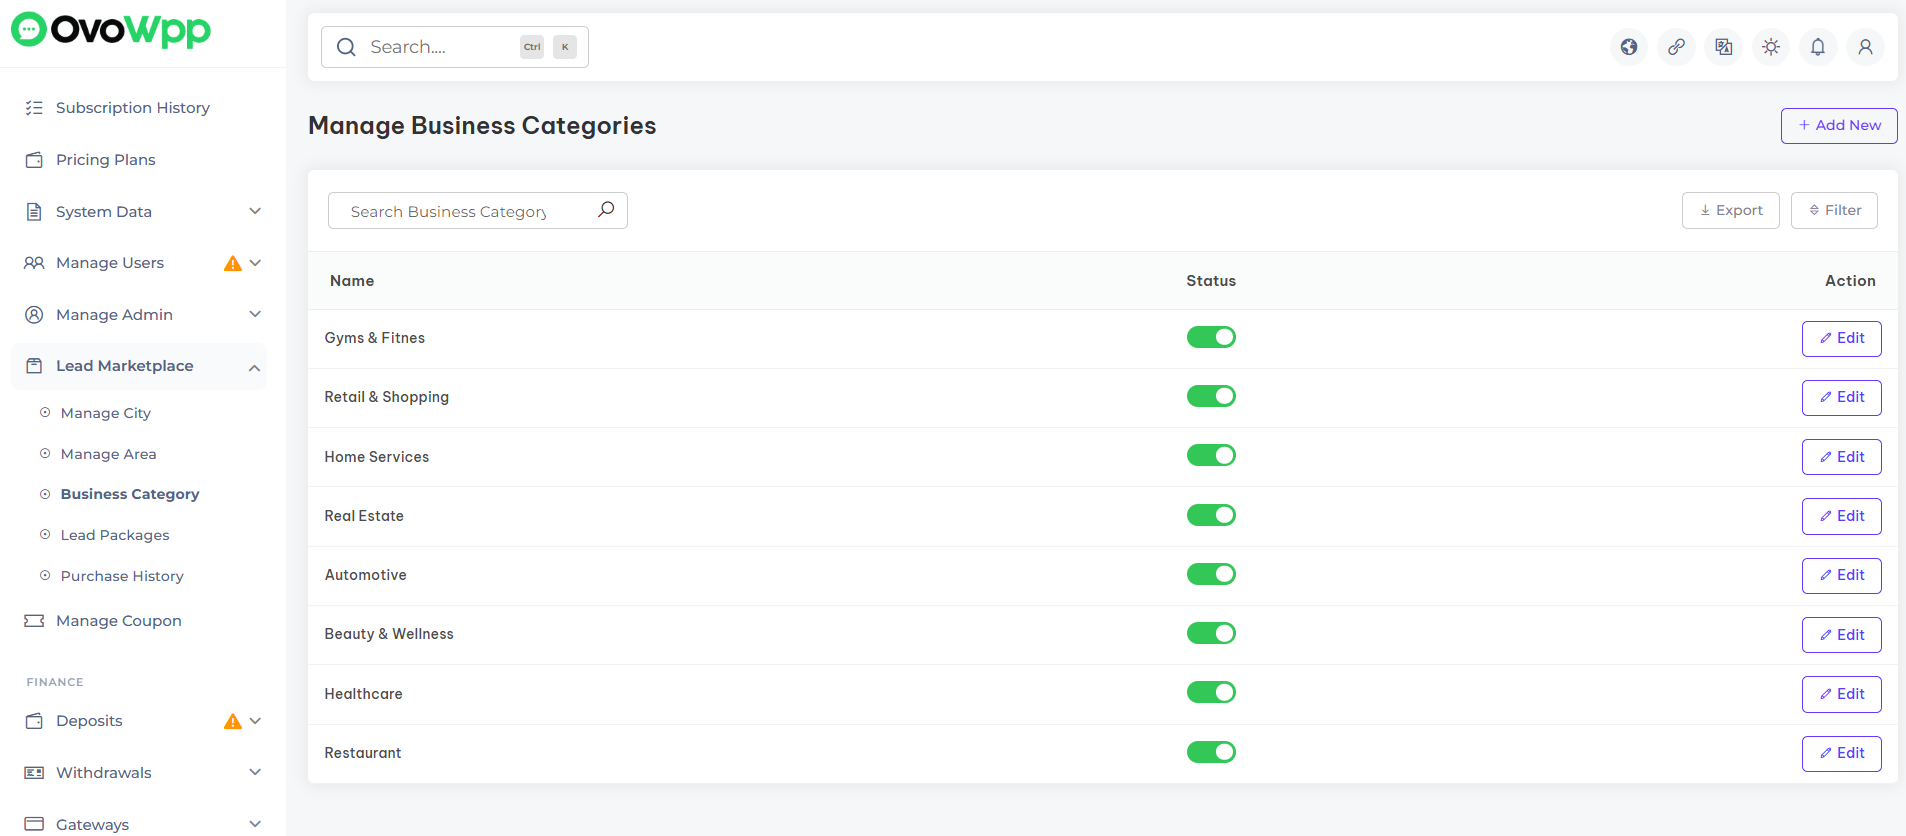
Once the LeadWpp Addon is installed, you can manage the business categories used for lead generation. Add, edit, or active/inactive categories to help admin search for specific types of businesses on Google Maps and generate more relevant, targeted leads.
Lead Packages
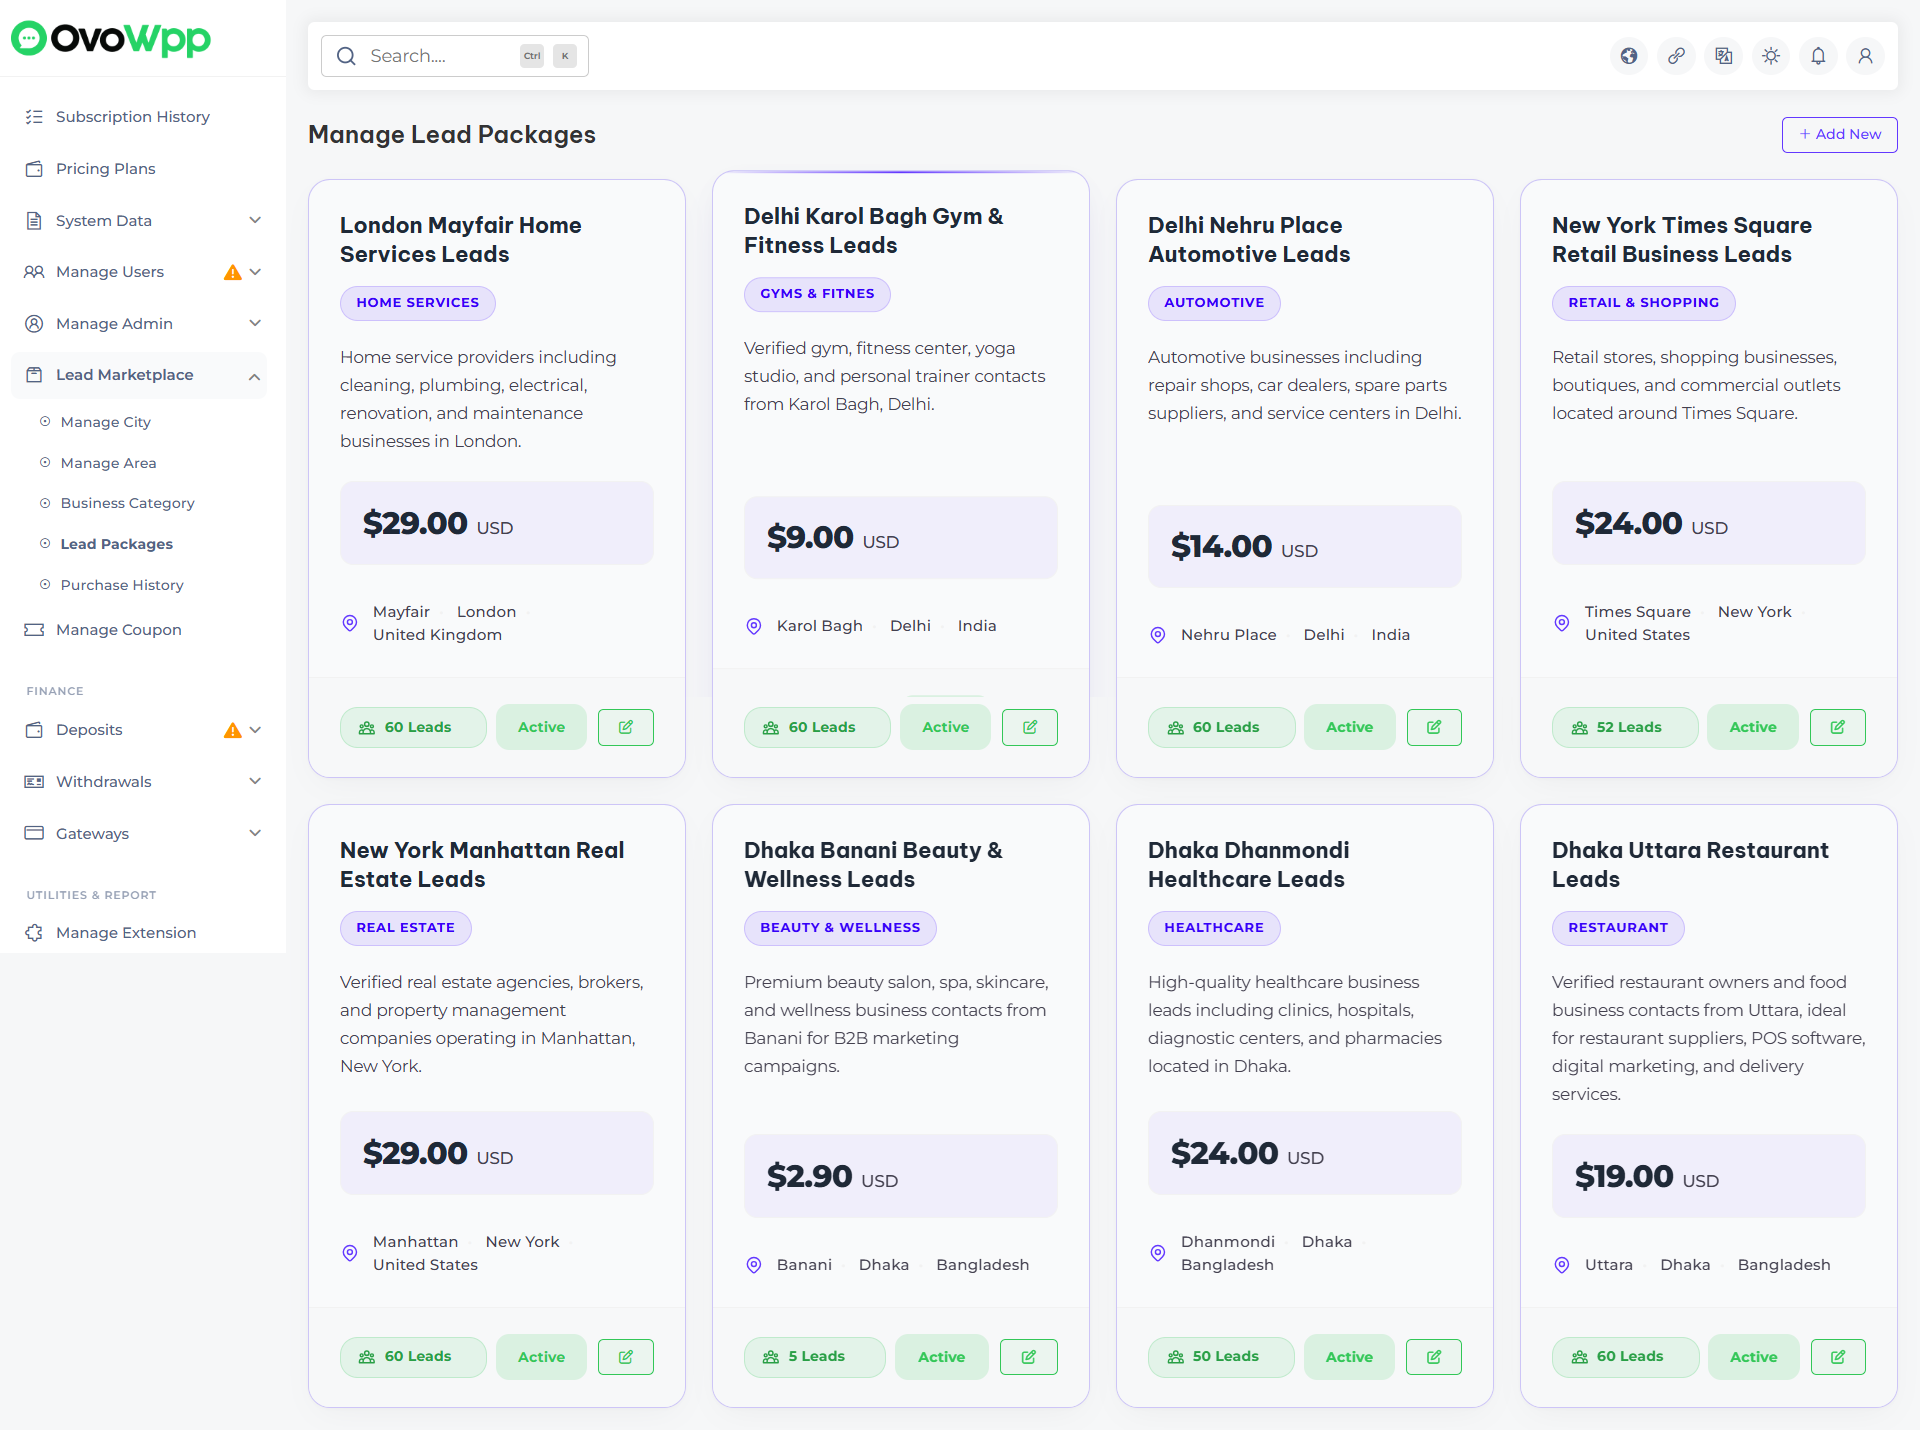
Once the LeadWpp Addon is installed, you can create and manage lead packages based on specific cities, areas, and business categories. Admins can configure customized lead packages with targeted locations and categories, allowing users to purchase packages and access relevant business leads generated from Google Maps.
Purchase History
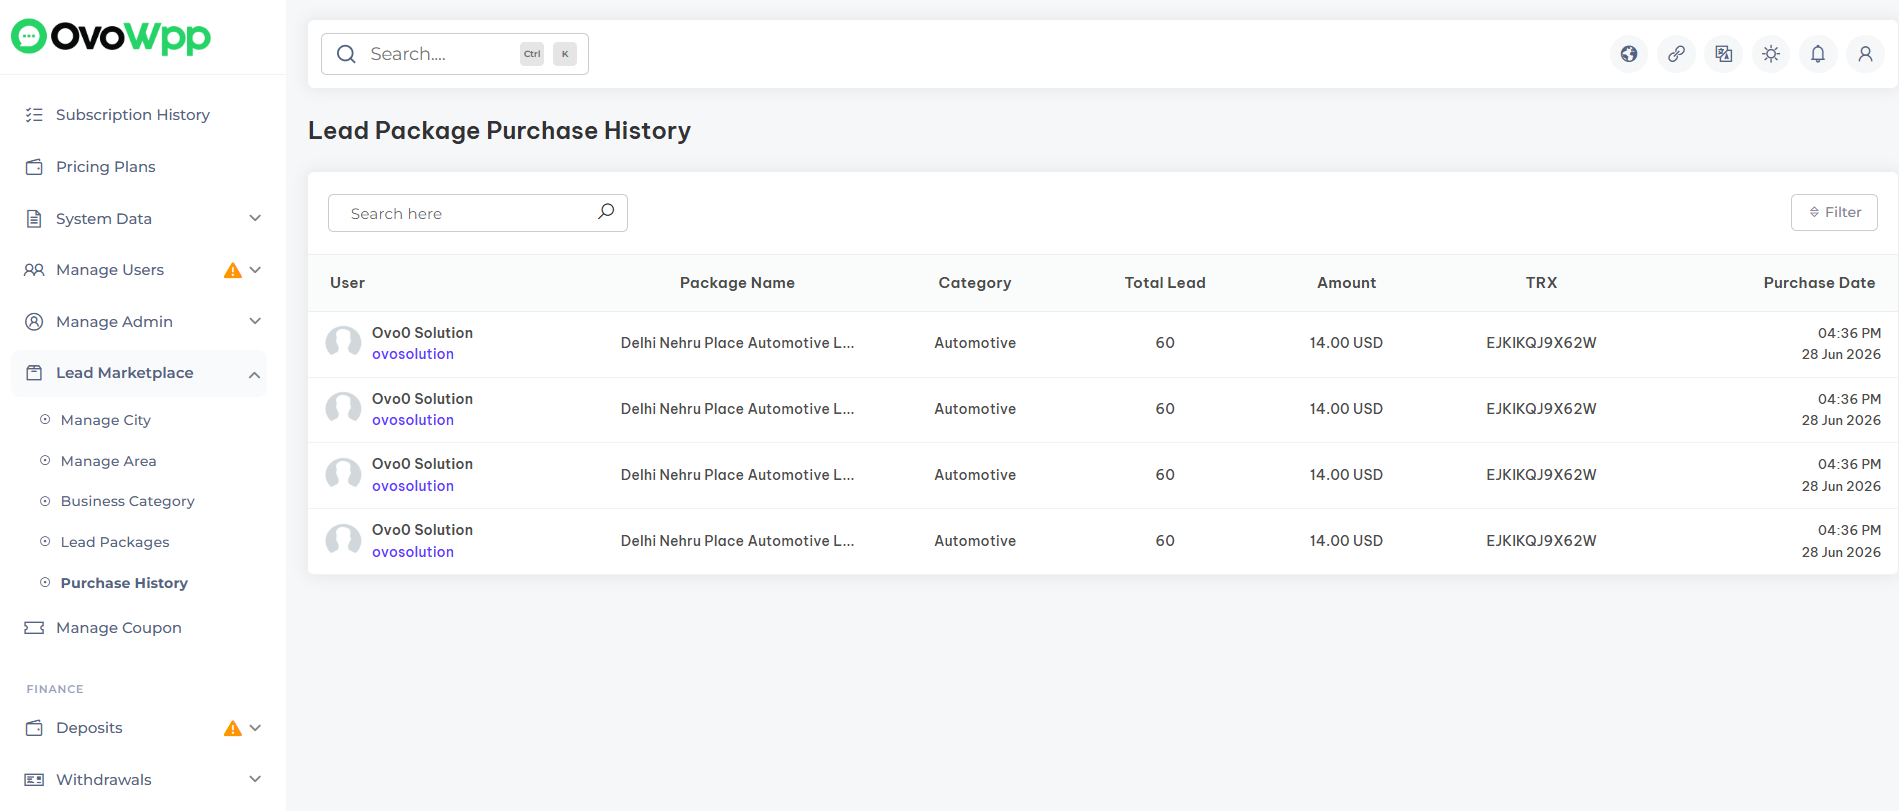
Once the LeadWpp Addon is installed, you can track and manage all lead package purchase activities from users. Admins can view complete purchase history, including user details, purchased packages, and transaction records to monitor lead package sales and user activities.
Information
Overview of addon information and technologies
In the Overview of addon information & technologies section, you can find key details about your addon, including its name, version, and the technologies used. This section provides an insight into the technical foundation of your addon, helping you manage and maintain its infrastructure effectively.
Support
How to get assistance
Thank you for purchasing our product! For any support or assistance, feel free to reach out to us via the provided email address. Our dedicated support team is available 24/7, ready to help with any questions, technical issues, or inquiries you may have. We are committed to providing prompt and reliable assistance to ensure a seamless experience with our product. Your satisfaction is our priority, and we are here to support you every step of the way.